
It’s been years since we’ve bothered to print any of the thousands of photos we take each year. Many of you have probably made a similar choice.
But beginning in 2006, one thing we have been pretty disciplined about is taking some time each year to create and print at least one memory book. Using photos and text we summarize our hiking, biking and other day-to-day adventures as well as highlights from family vacations, school trips and other events. In some ways, each year’s photobook is a printed version of excerpts from this blog. But the printed materials also include more personal information and more photos of family members. Our hope is that our children will be able to look through these books years from now and that the images and descriptions will trigger childhood memories and prompt them to say to their own children something like, “When I was a boy….”
We finished creating our 2012 photobook the first week of November (yes, we’re a little slow this year). In case any of you have ever wondered about what’s involved in getting a custom book like this printed, here’s an overview of our workflow…
- Sort through your photos and select the ones that best capture the memories you’d like to preserve. Between us, Mr. GeoK and I took about eight thousand photographs in 2012. After a few days work, we narrowed that massive catalog down to about 400 photos that we would consider as we created the layout for our book.
- If necessary, edit your photos. We know, for example, that the printing service we use tends to “crush the blacks” (Mr. GeoK’s description), so we tend to overexpose our photos just a little when we’re ready to incorporate them into our annual book.
- Make your photographs available to your layout software. Ever since we started an annual photobook project, we’ve been using the tools on the Shutterfly website to do our layouts. Options on Shutterfly include using their online photo uploader or downloading software to your desktop and using that (this is the better option if you have more than a few photos to upload at one time). Some photobook printing sites allow you to grab photos from your flickr account or other cloud-based service.
- Create your photobook. Shutterfly offers several page sizes and cover styles. It also offers to layout your entire photobook for you. We’ve never used this option because I like to decide for myself which photos to group together, how large each photo should be and more. I also like to include a fair bit of text (a lot of the text is based our blog posts), and prefer to place the text on the first or second page of a series of pages depicting a particular hike or other adventure.
- I’ve learned over the years that it works best for us to layout the photos first. Then I ask Mr. GeoK to take a look, just in case there’s a photo I haven’t included that he would really like to see appear in the book or there’s something about the page layouts and groupings of photos that I miss because I’m so deep into the details.
- At this point, we usually end up going back to our photo library to select alternate images for a couple of spots or to add another image that highlights some aspect of a hike we missed the first time through.
- The next step is to add the text, proofread everything, ask Mr. GeoK to proofread everything and then leave the saved file for a day or two to get a little distance from the project.
- Finally, I do one last preview. Then it’s time to place the order. I have never paid the “regular” price for a photobook. Shutterfly regularly sends out e-coupons, so if I don’t have a promo code that’s currently valid, I just wait until the next time there’s a promo code for photobooks (often good for 40% off).
- Then it’s time to wait impatiently until the photobook arrives in the mail!! It’s always very interesting to see just how close the finished product matches the imagination.
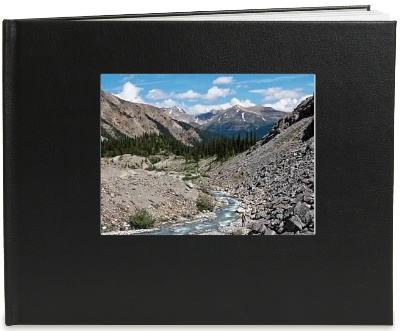
Here’s a peak at the cover for our most recent photobook:
Once it arrives and we look through it a few times, we’ll put it on top of our slowly-growing stack of custom photobooks. We’ll take it out from time to time to dust the cobwebs off our memories of 2012.
We’ve also done a couple of small photo booklets using the Snapfish service (usually when we have a “free 20 page photobook” coupon; they come every year with the boys’ school photo orders). This smaller sized booklet is perfect for preserving memories from the boys’ overnight school trips and similar events.
A few final comments about Shutterfly:
- We’ve also used Shutterfly’s service to put together custom calendars and greeting cards;
- Since Shutterfly stores copies of all of the uploaded images on their servers, we have a last-resort back-up of many of our favourite images (this is not a substitute for regular back-ups, including off-site storage of back-ups, but it does provide some insurance against a disaster); and
- We’ve only ever had one product arrive damaged. We contacted Shutterfly via email and they promptly re-printed and replaced the damaged book at no cost to us, without any hassle.
- They also offer a “share” service that allows you to send family and friends a link to a digital copy of your photobook, if you think they might like to take a look.
We’d be very interested to hear about your experiences with other photobook printing services. And whether you workflow includes other steps that we should incorporate into our process next time around. We’re hoping to get started on our 2013 photobook project soon, so please share your advice by leaving a comment.
Hello GeoKs,
Hope you all are having a great day!
My name is Shanice Harris and I am a Graphic Design student based in New York City. Just wanted to know if you have an email that I can reach you at. I want to discuss something with you all. Looking forward to talking to you.
SH
Hi Shanice. I’m intrigued. Looking forward to the discussion via email. Please use geoks@shaw.ca
~ Denise (aka Mrs. GeoK)
Pingback: Creativity, Connection, Collaboration | Out and About with the GeoKs